The factory daytime run lights (DRL) offer little light for driving purposes. I looked at possibly upgrading them with LED, but that is mostly just color/looks and would not help much for illuminating the road. Additionally, I like the way projectors look in the front vs the bland / cheap factory DRLs.
So as a part of my ZL1 front end conversion, I set off to upgrade to projectors. This is no small mod, it requires proper cutting and drilling of the factory ZL1 bumper cover. AAC offers a 90mm hella (http://www.automotivelightstore.com/CamaroFogKit.aspx) upgrade kit with HID that runs about 350$.
I picked up 4300k slim ballast 35 watt H7 HID kit (http://www.lightinthebox.com/h7-hid-xenon-kit-with-thin-ballast-35w-ht001_p239928.html) for 69$ and two hella 90mm projectors (http://www.amazon.com/HELLA-008193027-Series-Halogen-Headlamp/dp/B00062ZYNK/ref=sr_1_2?ie=UTF8&qid=1374246557&sr=8-2&keywords=hella+90mm) for 61$ a piece.
Outside of a couple o-rings and relays, it puts me at about 191$ for the upgrade. 200$ for HID projector DRLs got two thumbs up from me.
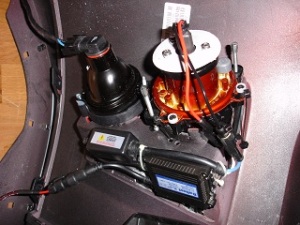
So, the task is to make this:
Look like this:
The HID bulbs won’t be using the H7 twist locks.
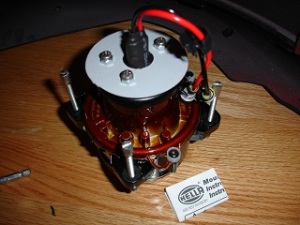
I yanked the H7 bulbs and removed the rear plate from the projector via 3 torx screws.
I then dremeled that part down to the outside radius.
I left enough of a lip to make the o-ring land for the bulb to seal against.
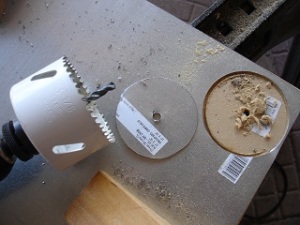
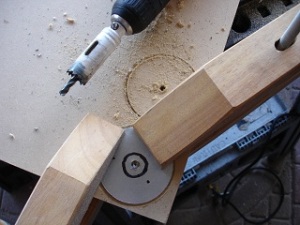
I then took a piece of 26 gauge steel I had laying around to cut out plates that will be used to seal the bulbs to the light.
Once I had two plates cut, I then used the rear plate and an awl to etch the main hole and 3 screw hole locations.
I hit them with black marker to make it more visible to the camera
I reused the same pilot hole with a smaller hole saw to cut the center hole for the power wires of the bulb to go through.
I spray painted the plates with a coat of primer on the front and back.
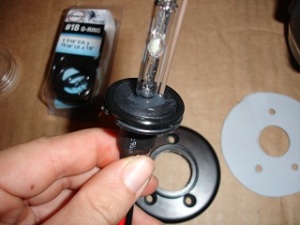
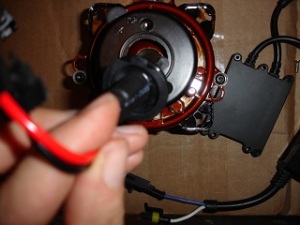
Then after they dried, I put a 15/16ths inch I.D. o-ring around the base of the HID bulb. (careful not to touch the bulb, oils and dirt will shorten the life)
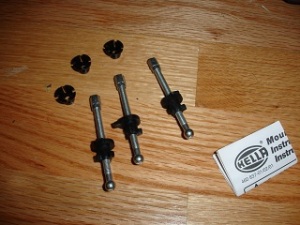
The fixture’s back plate goes on the fixture, followed by the bulb, then the new retaining plate and then it all gets screwed down. I had to use longer stainless steel screws, due to the added length.
all screwed together, it tightens the o-ring and seals the bulb.
Finally, the rubber seal is cut down on the pigtail, removing the H7 pigtail and only leaving a piece to silicone to the HID bulb base.
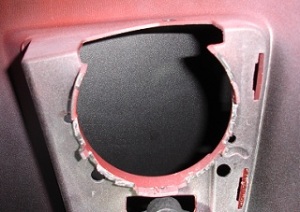
The factory bumper has to be cut to facilitate the hella fixture.
The cut-out is important to conform to the black base of the light, as it will be the primary orientation and support method. Particularly important are these indexing triangles.
Carefully, test fit, cut and re-test until I got the right depth to allow three key things: 1: The top of the glass lens to just rest against the black light fascia
2: The unit to rest at the bottom of the bumper cover, like a cradle.
3: The unit to stay level with the ground [using the 4 black tabs that form a square to gauge the angle.
Start with this:
Watch the triangle indexes on the black base
The outside corner adjustment hole should JUST overlap the corner of the bumper cover. This is critical.
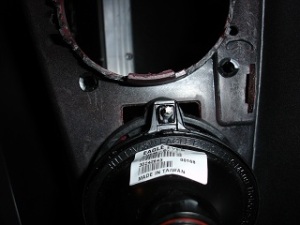
Once things are trimmed, the front black fascia is removed from the front bumper cover to allow drilling without damage. 3 holes must be drilled in the bumper cover to either zip-tie or mount support springs to the 3 orange mount holes on the fixture. (you can see one in the photo above.)
Additionally, 2 holes must be aligned and drilled with the two big adjustment holes in the bottom side of the black base of the fixture. These will have the be the right size to allow the black inserts from the adjuster screws to fit.
The hella kit uses up to three screws to adjust the light angles.
Once the holes are marked and drilled, this is the result.
and with the adjustment clips installed
The adjuster screws were inserted into the fixtures and bases of the screws rotated to the “locked” position.
The front black light fascia was re-installed to the bumper cover.
I used zip-ties, some people may want to be romantic and use stainless tension springs to the holes. Meh. So, zip-ties were used to tension the light to the bumper cover. (not crazy tight but not loose that would allow vibrations under road trauma) Only enough play has to remain to allow minor adjustments with the screws.
Adjusters, in the hole.
The HID ballasts were all plugged in and mounted to the bracket, which I bent the tab and screwed to the top of the light installation area. Then zip-tied the cables together. (Note, I hope there is is enough room to clear when installed on the car, I did not check this yet.)
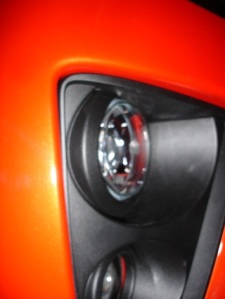
Installed, the front looks like this:

