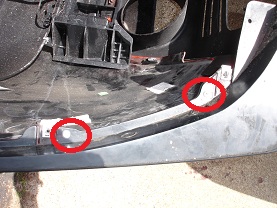
Earlier in the week I finished painting the rear air diffuser and had to wait for the superbrightleds.com LEDs to come in, so I could do all of the work with the bumper removed once.
I also fixed the installation of the ZL1 rear mud flaps. I had put them on the outside of the wheel well liner vs. Inside. (No instructions provided). -1 point for the guy I ordered from.
I will make a post on the lights later.
Bumper removal was easy. 3 screws and one 7mm bolt per wheel well. 3 body clips per panel above tail light. Snap side outward and pull back. Support with a box. Repeat for other side. Drop on the carpet you placed underneath to keep from damaging the paint. 😉
Doing this one man in the sun wasn’t great.
I mis-read the instructions and thought the “four silver clips” to install for the inner and outer tabs were the four recovered from the stock diffuser. I’m trying to figure out how the f they are going to be flush with the top of the tabs. So I made holes in the tabs and screwed them in. Well… they were supposed to be shallow silver push clips… sufffice to say it won’t be coming off on it’s own easily.
Fortunately I had 4 spare silver screw clips from cutting out the rear speaker locations earlier.
Mating of the diffuser to the bumper was uneventful, but would go faster with two men.
One man, you get the tabs aligned. Anchor the big tab with the black push clip, then work from the middle to that end with the silver push clips. Just make sure the next 2-3 tabs on either side of the one you are going to push on are in the holes and not misaligned. Rinse and repeat the other side. I did the other side’s big black tab last, it was easier. Now repush the clips to assure firm seating. Then snap the support in-place, screw 4 bolts into the 4 recovered silver clips.
Now at this time, I attached the zl1 rear mudflaps. (Incidentally, they go behind the wheel well lining.) Added a medium and small aluminum pop rivet to each flap and the bumper cover and then….
Drilled a hole between the zl1 flap and the front leg of the diffuser, using the hole in the zl1 flap and aligning the “hang” of the diffuser. I then added a silver screw clip to the diffuser side and screwed the flap to the diffuser. I was happy, it looked like they were made for each other and the mutual support structure is great!!


Leave a comment